
Going Lean
The DietPi minimalist distribution improves the performance of the Raspberry Pi and other single-board computers as servers and desktops and comes with more than 200 specially chosen applications and services.
Since the first appearance of the Raspberry Pi more than 10 years ago, many hardware vendors have followed the idea of an inexpensive computing powerhouse on a small board. Companies such as Asus, Odroid, and Pine64 all jumped on the single-board computer (SBC) bandwagon, naturally increasing the number of operating systems (OSs) for these boards. Most of the OSs are based on the ARM architecture and can now be found in various sectors of home computing and industrial applications.
The Debian-based Raspberry Pi OS is a very useful desktop replacement, and many Linux distributions offer their own offshoots for the Raspberry Pi. For example, LibreELEC is a media center, and gamers will enjoy RetroPie and Batocera. The lean, minimalistic DietPi is a great choice for small servers, older Raspberry Pis, and virtual machines. Thanks to carefully considered scripts, the set up is a convenient process.
From Debian
DietPi first entered the digital world in 2014. The purist operating system was initially built on Raspbian (today’s Raspberry Pi OS). It now builds directly on Debian and supports numerous SBCs and architectures. In addition to x86_64, ARMv6, ARMv7, AArch64, and RISC-V, the project supports virtual machines such as VMware/ESXi, VirtualBox, Hyper-V, Parallels, UTM, and Proxmox. Besides images for virtual machines, you will find images for the Raspberry Pi, Odroid, Pine64, Radxa, Allo, Asus, NanoPi, Orange Pi, and the VisionFive RISC-V board.
The distribution mainly targets headless server applications (i.e., applications that do not require a display). However, if required, you can set up an X11 graphical user interface (GUI). In total, DietPi comes with more than 200 thoughtfully chosen applications for installation in its package repository.
I tested DietPi on a Raspberry Pi and on a virtual machine running on Proxmox, which is recommended if the compute power of an SBC is not up to the task at hand. The images for both tests were sourced from the project’s download page : Just unzip the 7-Zip archives on Linux with the 7z tool. On Windows, the package name is 7-Zip for Windows, and The Unarchiver does the same job on macOS.
From an SD Card
The procedure for the Raspberry Pi and other SBCs that boot the operating system from an SD card is probably familiar to most readers. To begin, you unpack the image from the archive and transfer it to the SD card. On Linux, for example, you can use BalenaEtcher, whereas a good choice on Windows is Rufus. If you are on Proxmox, you can install DietPi manually or run a script.
To download the installer script from GitHub, make it executable, and run it, use:
$ wget https://raw.githubusercontent.com/dazeb/proxmox-dietpi-installer/main/dietpi-install.sh
$ chmod +x dietpi-install.sh
$ ./dietpi-install.sh
The script prompts with some default settings you can adopt. The only input required is the name of the instance, which will normally be local. When done, you just need to start the virtual machine created by the script.
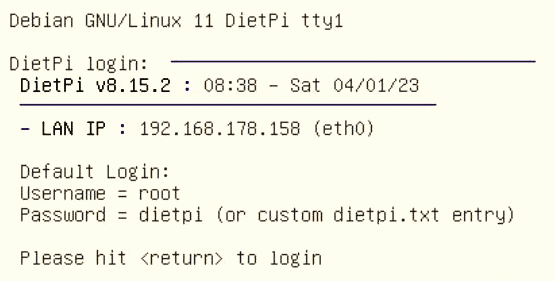
For the Raspberry Pi, insert the SD card and connect the device to a power source. The first boot process takes longer than later boots because of basic set-up steps and the automatic resizing of the root filesystem. Depending on the hardware, this process could take a few minutes (Figure 1).
Display or SSH
For a first start, I recommend connecting a display. After that, you can access the system with the Dropbear SSH server, which is enabled by default. If no display is available, you can discover the Raspberry Pi’s IP address from your router or run the command
$ sudo nmap -sP 192.168.0.0/24 | grep raspberryon another computer on the network, taking care to adapt the IP address to match your network.
With the IP address, root as the username, and dietpi as the password, you can then use ssh to log in. Your next step is to open the dietpi.txt configuration file and modify the hostname and passwords. After the initial login, DietPi searches for updated software packages and installs them; again, this step can take some time to complete.
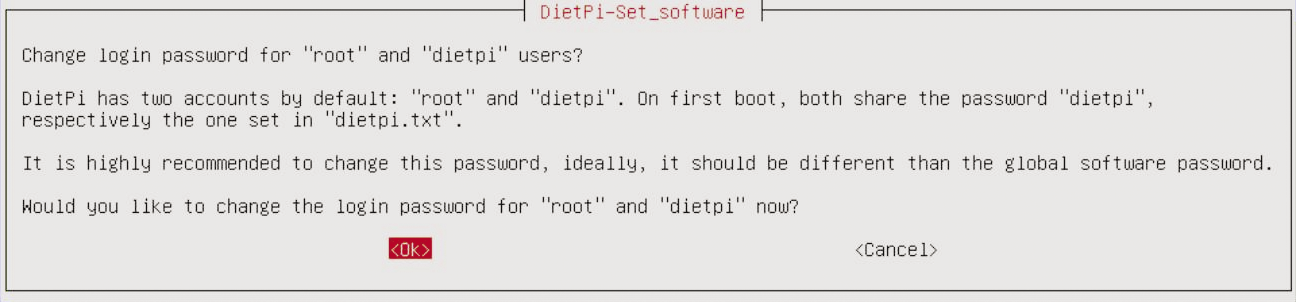
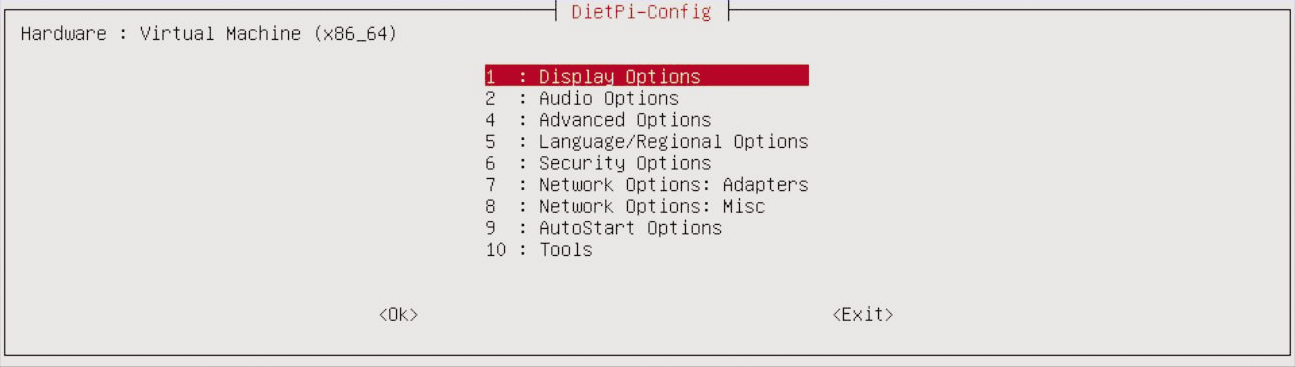
If you want to help the developers by sharing important information, you can agree to DietPi submitting anonymized information about your usage behavior. In the final step, change the general password and the passwords for the user and root accounts, if you have not already done so (Figure 2). Changes can be made at any later time with the DietPi-Config script (Figure 3) or the passwd command.
Curated Software
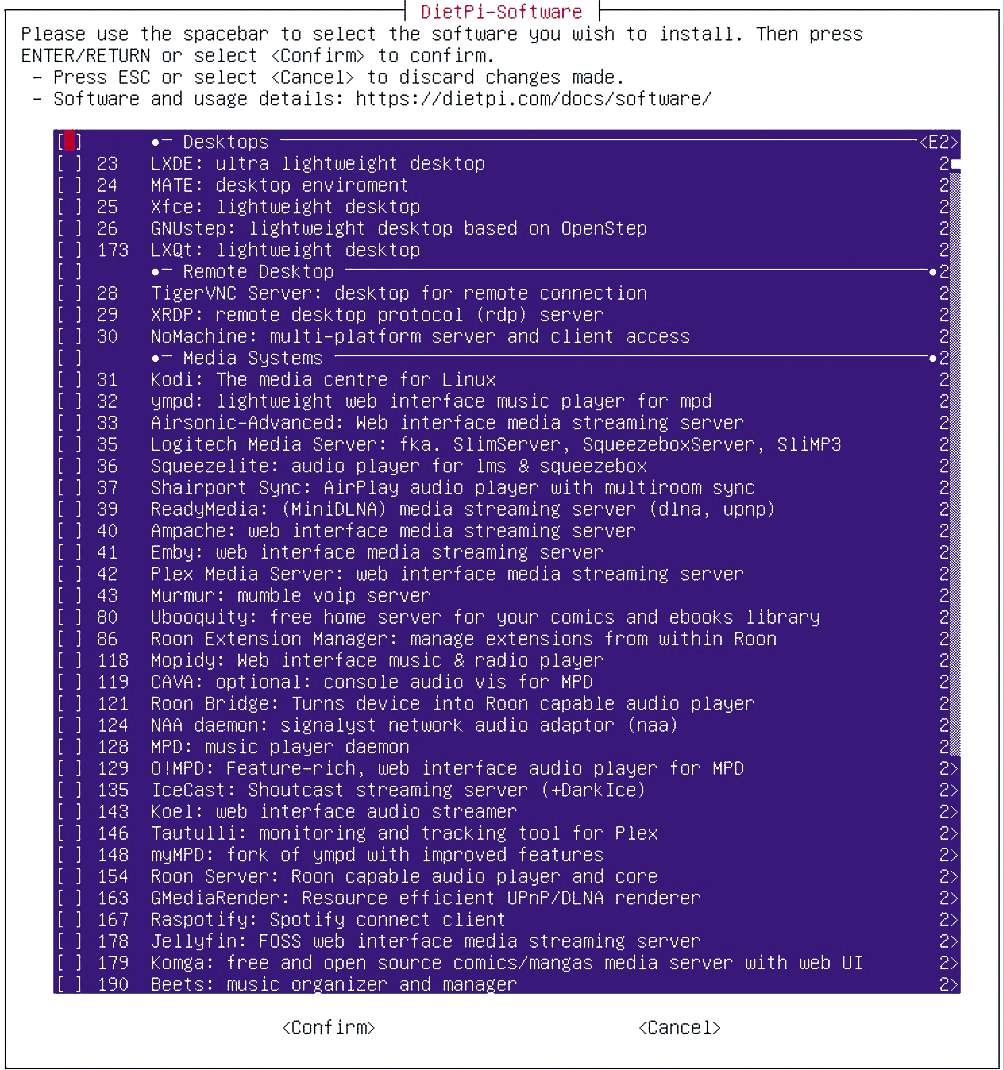
So far, so good. Now it’s time to turn your attention to the DietPi-Software script (Figure 4), which lets you access the DietPi configuration, documentation, SSH server, and log system. Most importantly, it gives you access to the tool you can use to install or uninstall applications customized for DietPi. Select the programs you want to install in Browse Software. If you want to run the distribution with a display, you can choose between the LXDE, MATE, Xfce, LXQt, and GNUstep desktop environments.
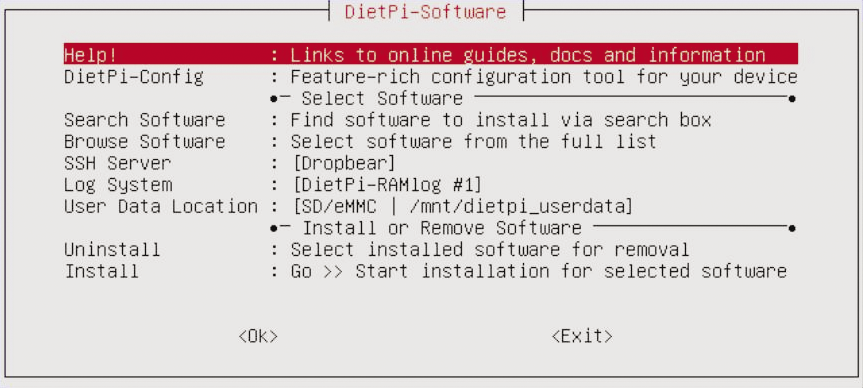
DietPi-Software module lets you access the DietPi software.You will also find a large number of media systems and tools (e.g., Kodi, Plex, Emby, and Jellyfin). Other categories include BitTorrent & Download Tools, Cloud & Backup systems, Gaming & Emulation, Remote Desktop & Remote Access, Webservers and stacks (Web development), Home Automation, and Advanced Networking. Search Software lets you find applications by entering a title, a category, or an ID in a search box. I entered Nextcloud and up popped Nextcloud and Nextcloud Talk as matches; I then proceeded to install the first entry. You can also select several applications in a single step; the Install menu item installs your choices on the disk (Figure 5).
Nextcloud gives you a choice of web servers. After you confirm, the installer first runs apt to set up the server, and then takes care of Nextcloud itself. The script automatically selects and sources the dependencies of the components selected for installation. For example, the Plex media server is installed with the Alsa sound server as its underpinnings. I finally added LXQt as an interface (Figure 6).

Conclusions
DietPi is a good choice for server applications, virtual machines, or as a desktop system for devices low on resources. This lightweight Debian OS comes with many applications that can be installed with a few clicks.
An agile community provides monthly updates for the well-maintained distribution. The detailed documentation not only provides general information about system maintenance, but also goes into detail about the supported hardware.
I did not experience any issues during the tests in our lab, which is at least one reason you will want to shortlist DietPi when it comes to using an SBC as a server or desktop.