DOS, the Operating System of the 1980s and 1990s
There was a time when almost everyone used DOS. While Windows, Linux, macOS, and maybe Android and iOS are the dominant operating systems for today’s consumer market, you can still get DOS.
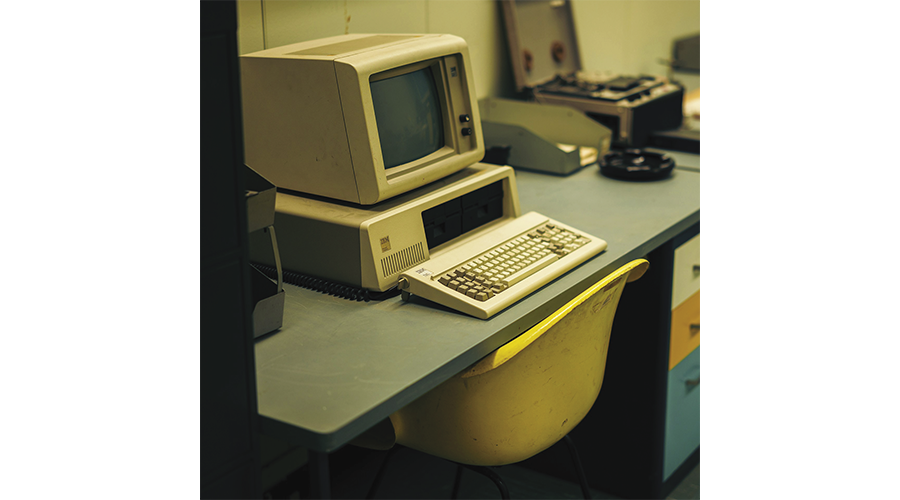
Microsoft DOS is a heavily outdated operating system, but it’s still popular with retro-computing fans, especially those who like to play old DOS games. If you want to run DOS on real hardware, you can grab an old PC from the 1990s and install one of the later versions of MS-DOS, typically MS-DOS 6.22 from 1994. If you have trouble finding an appropriate old computer, you can opt for a brand-new, DOS-compatible PC, such as the Pocket 386, a 386SX-based laptop that will run DOS and Windows 3.11 (Figure 1).

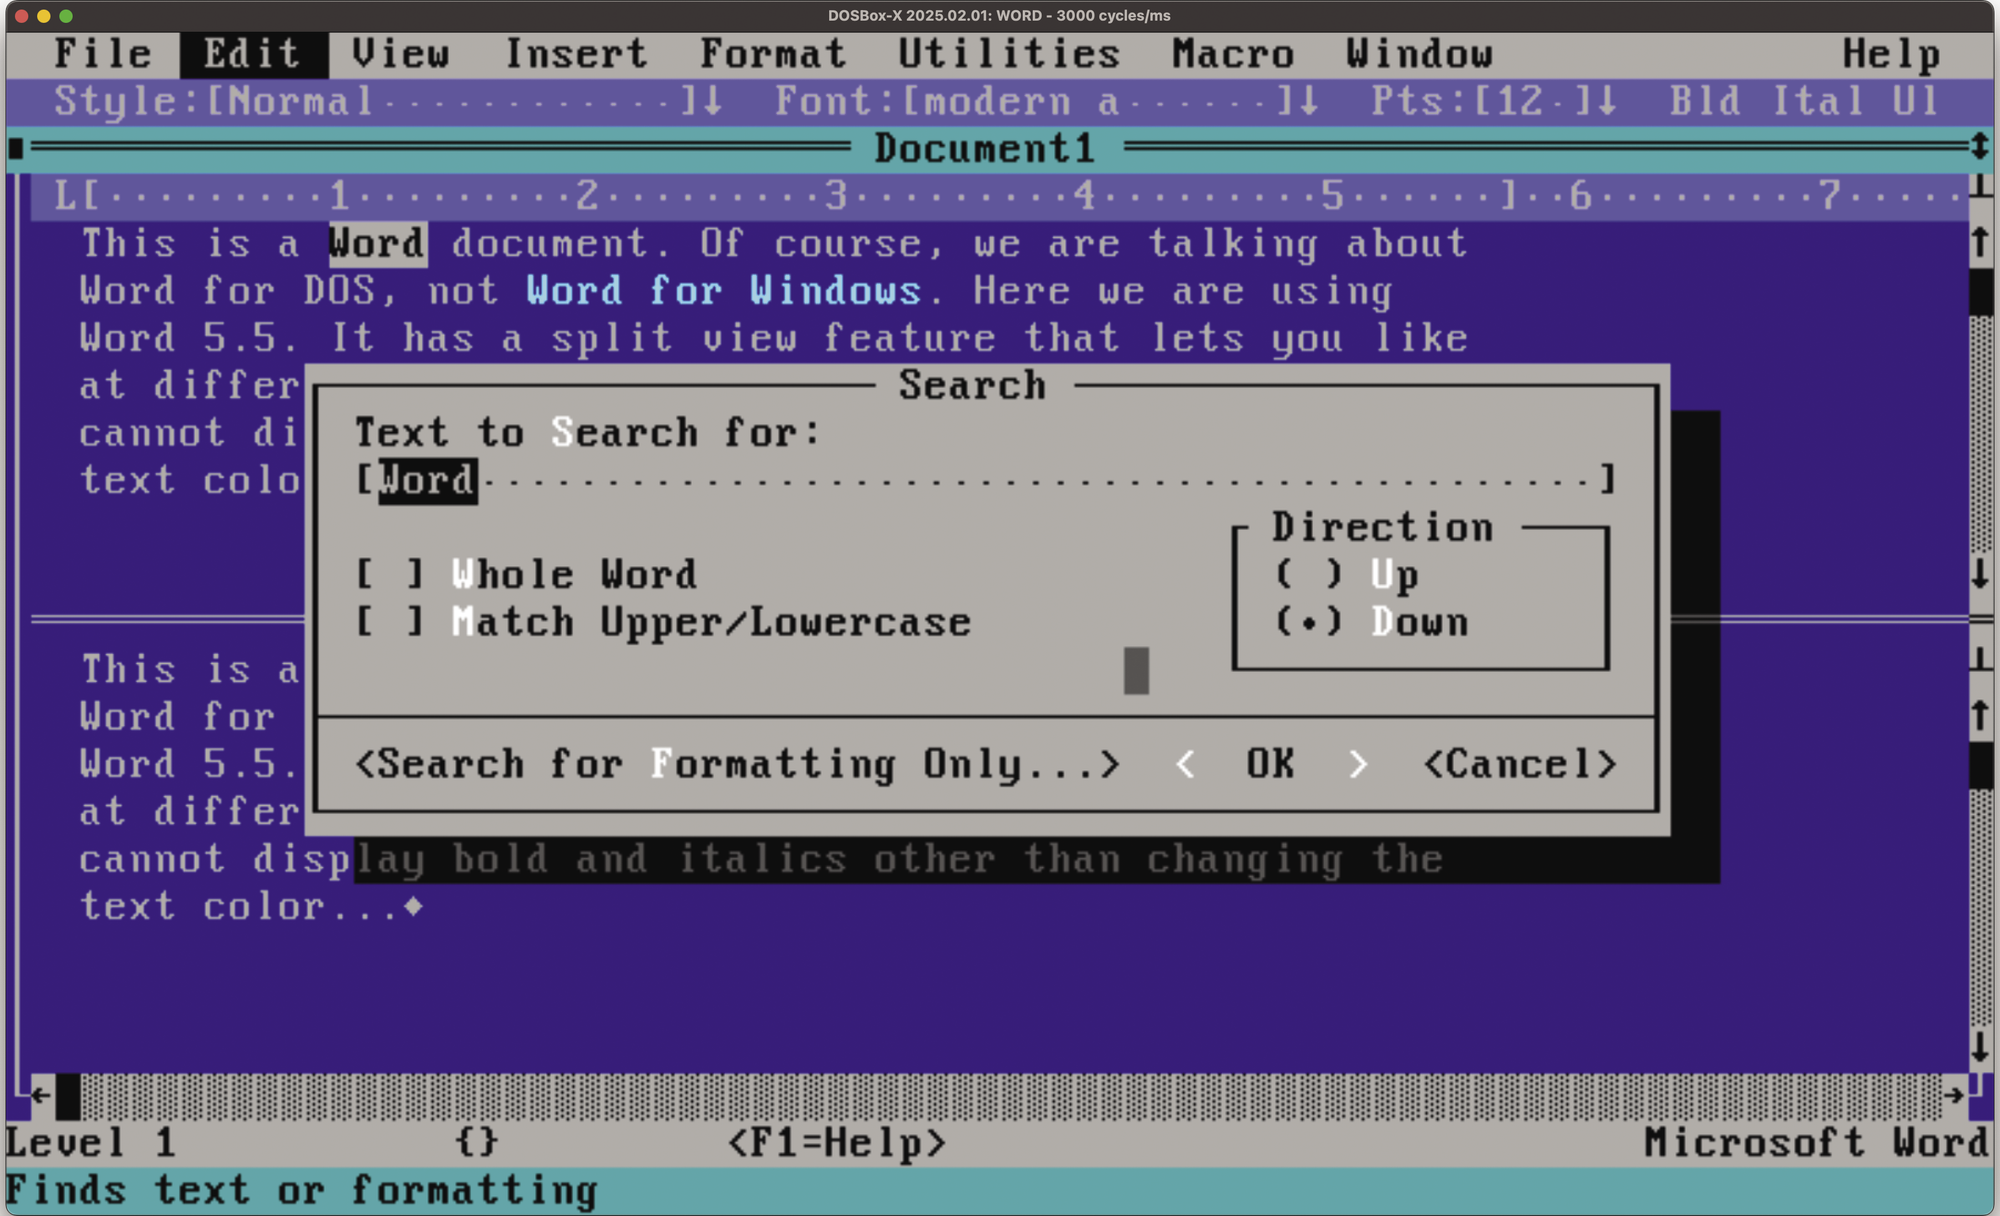
Such a machine will set you back more than $200. Emulation is a cheaper alternative: DOSBox-X lets you run DOS programs in a window, and it’s available for Windows, Linux, and macOS. Figure 2 shows DOSBox-X on macOS, running Microsoft Word 5.5 for DOS. With DOSBox-X, you don’t have to install MS-DOS or another DOS version, such as DR-DOS or FreeDOS, because it comes with its own built-in DOS clone. You can, however, install MS-DOS if you prefer to use the original.
Running DOS and DOS apps in a window works pretty well, and you can switch to full-screen mode to make it look more like the real deal – after all, DOS is not a multitasking system, so real DOS users see just one application that fills the whole screen.
Finding Software
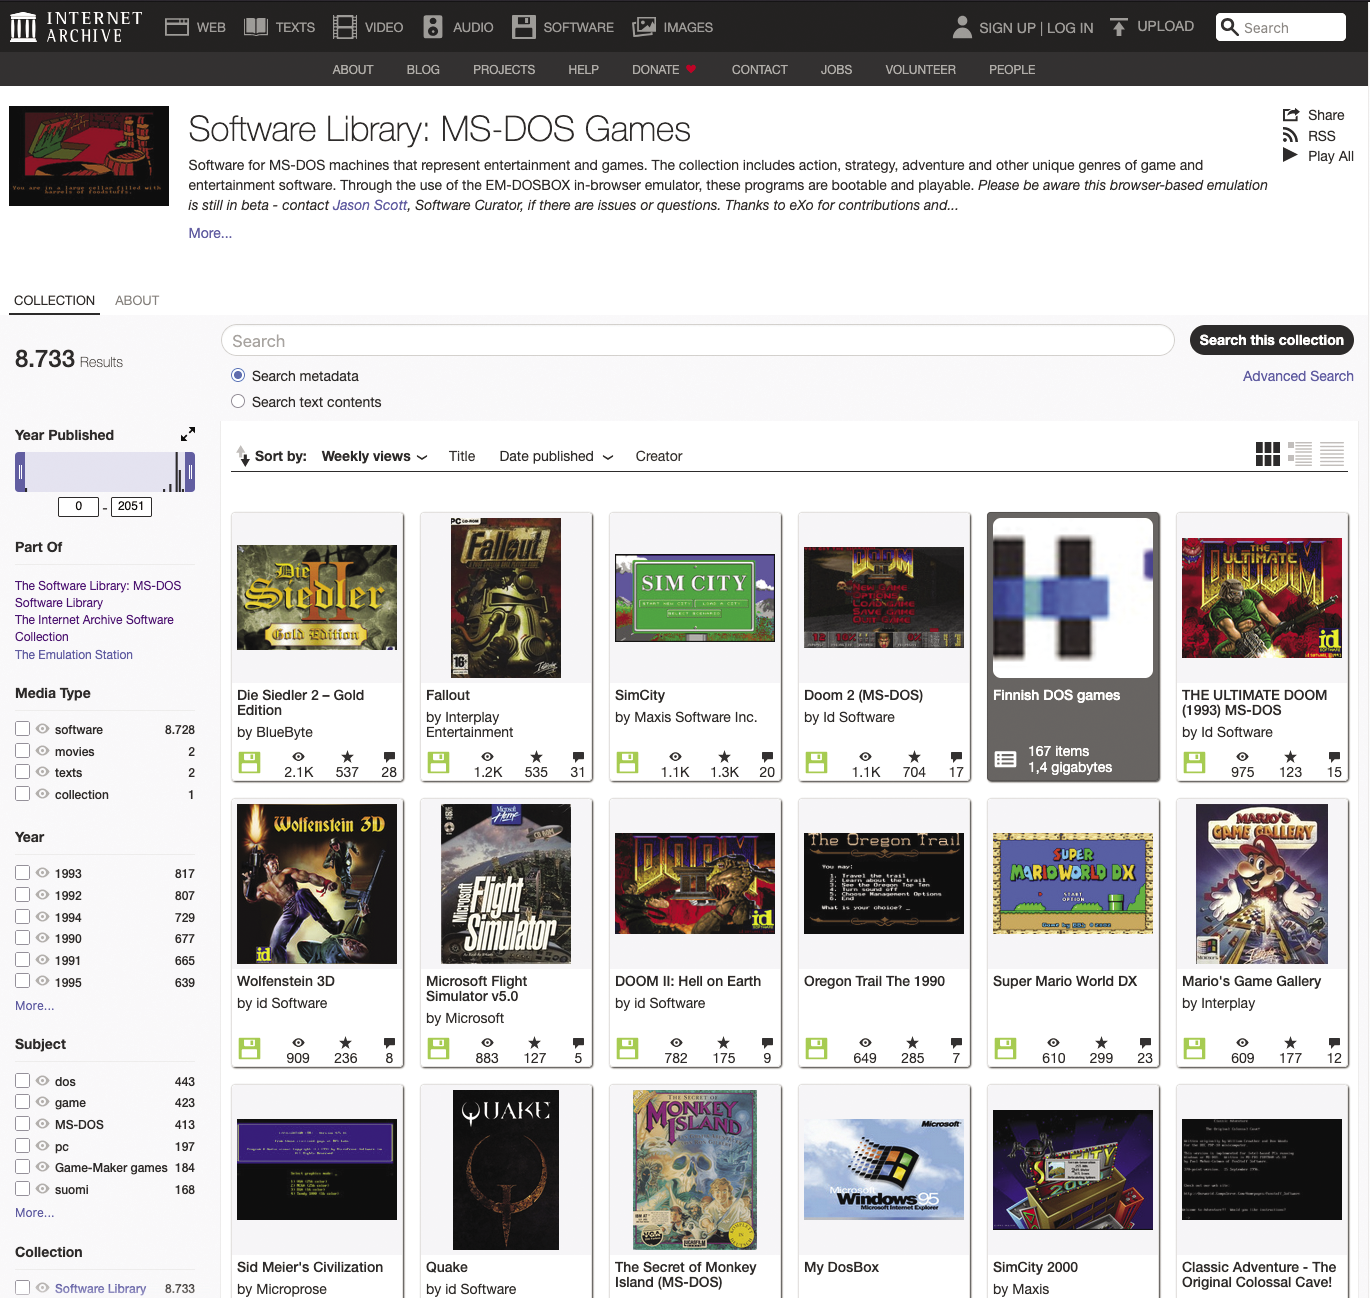
The ultimate resource for aged DOS games and applications is the Internet Archive. In its software library, you can find an MS-DOS Games section (Figure 3) and an MS-DOS Applications and Programs section; the Vintage Software Collection is another great starting point for browsing the depths of the archive.
In the DOS Games collection, you will find classic games such as The Secret of Monkey Island and the first first-person shooters (Wolfenstein 3D, Doom, Doom II, Heretic, and Quake).
Among the applications, you’ll find powerful stuff like word processors (Word, WordPerfect) and classical programming languages and development environments (Borland Turbo Pascal/C/C++ and Microsoft Quick Basic/QBasic/GWBasic).
Not every application you can find on the Internet Archive will be available for download – sometimes you can only see screenshots and run the program directly in the browser: Those games are marked as “stream only.” In such cases, it makes sense to search elsewhere, for example, on WinWorldPC.com.
Dosbian 3.0
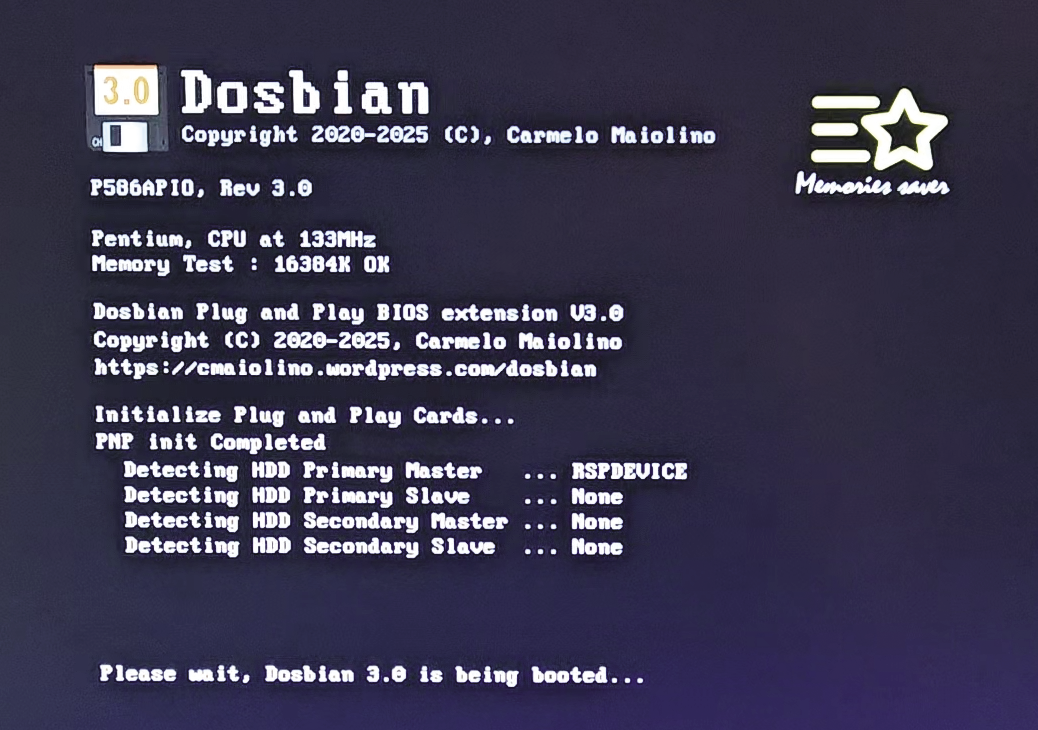
If you want to set up a dedicated DOS gaming machine and you have a spare Raspberry Pi, then have a look at Dosbian. The stripped-down Debian Linux distribution does not boot into a graphical desktop – instead it automatically starts the DOSBox emulator (Figure 4). Notice the spelling: DOSBox is not the same as DOSBox-X, though DOSBox-X is based on DOSBox. While it seems that development of the classic DOSBox program has stopped in 2019, the Dosbian creator prefers it over the newer DOSBox-X variation. The two projects target different audiences: DOSBox is intended to run DOS games and nothing else, whereas DOSBox-X describes itself as “also a platform for running DOS applications, including emulating the environments to run Windows 3.x, 9x, and ME and software written for those versions of Windows”. There is, however, yet another project named DOSBox Staging, which has also branched off DOSBox and continues development with similar goals as the original emulator (i.e., it focuses on games).
Dosbian’s initial setup is similar to most other systems for the Raspberry Pi: You download a compressed image, unpack it, write it onto an SD card (using the Raspberry Pi Imager or balenaEtcher), and then boot the Pi with this SD card inserted.
By default, Dosbian will let you access the contents of the home directory (/home/dosbian), which also includes dot files and dot folders. These files are hidden when you access the home folder from Linux, but DOSBox shows them with mangled file names (in order to fit DOS’s 8.3 naming convention). It’s not pretty, so I suggest creating a dos subdirectory and accessing that instead of the home directory.
When Dosbian has fully booted and shows the C: prompt, type exit to leave DOSBox. Then, on the Linux console, edit the config file for DOSBox in nano:
nano .dosbox/dosbox-SVN.conf
Press Ctrl+End to jump to the end of the file; in the second-to-last line in the [autoexec] section, modify the path of the mount command by adding /dos (turning it into /home/dosbian/dos). Then press Ctrl+X and make the editor save the changes. When you restart the emulator (by running the dosemu command) or reboot the Raspberry Pi, drive C: will be mapped to the dos subfolder.
Mounting Stuff
When you run DOSBox-X (or DOSBox), you’ll find yourself in the Z: drive, which only holds a few standard tools such as a text editor. In order to access other files on your computer, you need to mount a directory to a drive letter that your virtual DOS PC will then use to access that folder. If you’re using Linux or macOS, you can simply add a path argument when starting DOSBox-X: That path will then be mounted on C:. I prefer to cd into the folder with my DOS files and then start the emulator as follows:
dosbox-x .
The dot at the end of the command stands for the current directory. On Windows, you can use the longer command
"c:\Program Files\DOSBox-X\dosbox-x" -defaultdir . .(with two trailing dots, separated from one another and from the rest by blanks). This assumes that you’ve installed DOSBox-X to the c:\Program Files\DOSBox-X\ folder. It may be easier to simply start the program via the Windows Start menu and then mount the folder via Drive | C | Mount folder as floppy drive. This menu-based method works on all operating systems.
DOS programs will often be available as extractable .zip archives. In that case, you can either prepare a folder into which you unpack the archive in the host system, or you can add unzip and other unpackers to the folder that you mount on C:. If the .zip archive contains everything you need, it is also possible to mount that archive (instead of unpacking it and mounting the new folder) – that works well with many games.
If you use DOSBox-X on a Windows machine, there’s a shortcut to accessing files from DOS: Just try to use a drive that exists in Windows (e.g., by typing c: at the DOS prompt), and DOSBox-X will ask you if you’d like to mount that drive, using the same drive letter inside and outside DOSBox-X. However, if you do that for the system volume (C:), you’ll give the DOS applications full access to your whole system, which is not the best idea.
DOS in a VM
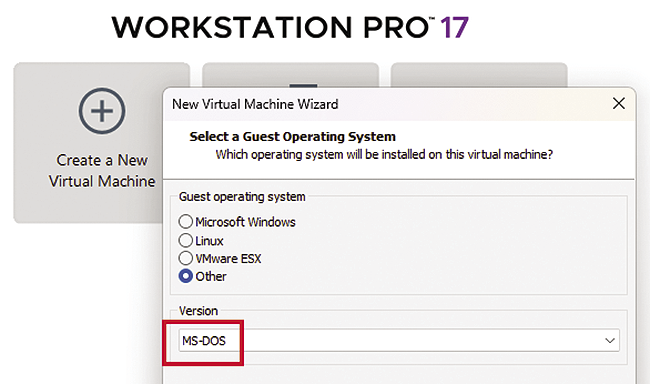
Instead of running DOSBox-X or DOSBox, you can also use virtualization software to create a virtual machine (VM) that you boot with a DOS installer. Figure 5 shows how VMware Workstation lets you create a VM with settings that are compatible with DOS. Other virtualization (or emulation) tools are VirtualBox and Qemu.
VMware and VirtualBox don’t really expect users to work with floppy disks, but you’ll occasionally need them for either installing DOS itself or for adding software.
One way to try out DOS in a VM without any configuration whatsoever is to download the FreeDOS Live CD image and run Qemu with the following command:
qemu -cdrom FD14LIVE.iso
If you want to install DOS in a Qemu VM, you will need to create a hard disk image and then boot from the install CD, partition and format the drive, probably reboot, and continue the setup. Qemu lets you do that with the following commands (Figure 6):
qemu-img create -f raw dosdisk.img 100M
qemu -hda dosdisk.img -cdrom installer.iso -boot d
-cdrom and -fda parameters.(If instead of a CD or DVD image you have a floppy disk image, replace the -cdrom parameter with -fda and turn -boot d into -boot a.) When you no longer need the installer ISO, you can remove the last two parameters and boot from the hard disk image with
qemu -hda dosdisk.img
Note that by default Qemu only emulates a PC instead of virtualizing it, leading to much slower speed.
If you use Qemu on a Linux machine, run qemu as
qemu-system-x86_64 -enable-kvm ...(kvm = Kernel Virtual Machine). If you’re on an Intel-based Mac, try
qemu-system-x86_64 -accel hvf ...
to use the macOS virtualization framework (hvf = Hypervisor Framework).
Actually Using DOS Tools
If you install an old DOS application because you need to edit ancient files (e.g., those created in the DOS version of Microsoft Word), you can write a shell script that lets you automatically launch DOSBox-X, mount the current directory, and open the file in the DOS program.
Listing 1 shows a Bash script that works on Linux and macOS and will launch DOSBox-X, mount the Word directory on C:, mount the directory with the document on D:, and then open the document in Word and quit DOSBox-X once Word is closed. It uses the readlink, dirname, and basename tools to find the absolute directory path and the file name (even when the argument is a relative path or just a file name).
Listing 1: dosword.sh
01 #!/bin/bash
02 # launch Word for DOS
03 PROGDIR=/Users/esser/dos/WORD55
04 FILEPATH=$(readlink ‑f "$1")
05 WORKDIR=$(dirname "$FILEPATH")
06 WORKFILE=$(basename "$FILEPATH")
07 dosbox‑x ‑c "mount c $PROGDIR" \
08   ‑c "mount d $WORKDIR" \
09   ‑c "c:" \
10   ‑c "word d:$WORKFILE" \
11   ‑c exit
You can easily set up several such Bash scripts for various DOS programs. Listing 2 shows the equivalent PowerShell script for Windows.
Listing 2: dosword.ps1
01 # dosword.ps1
02 param (
03     [Parameter(Mandatory = $true)]
04     [string]$FilePath
05 )
06
07 $ProgDir = "C:\Users\esser\dos\WORD"
08 $ResolvedPath = Resolve‑Path $FilePath
09 $WorkDir = Split‑Path $ResolvedPath
10 $WorkFile = Split‑Path $ResolvedPath ‑Leaf
11 Start‑Process "\Program Files\DOSBox‑X\dosbox‑x.exe" ‑ArgumentList @(
12     "‑c", "`"mount c $ProgDir`"",
13     "‑c", "`"mount d $WorkDir`"",
14     "‑c", "`"c:`"",
15     "‑c", "`"word d:$WorkFile`"",
16     "‑c", "exit"
17 )
Learn an Old Skill
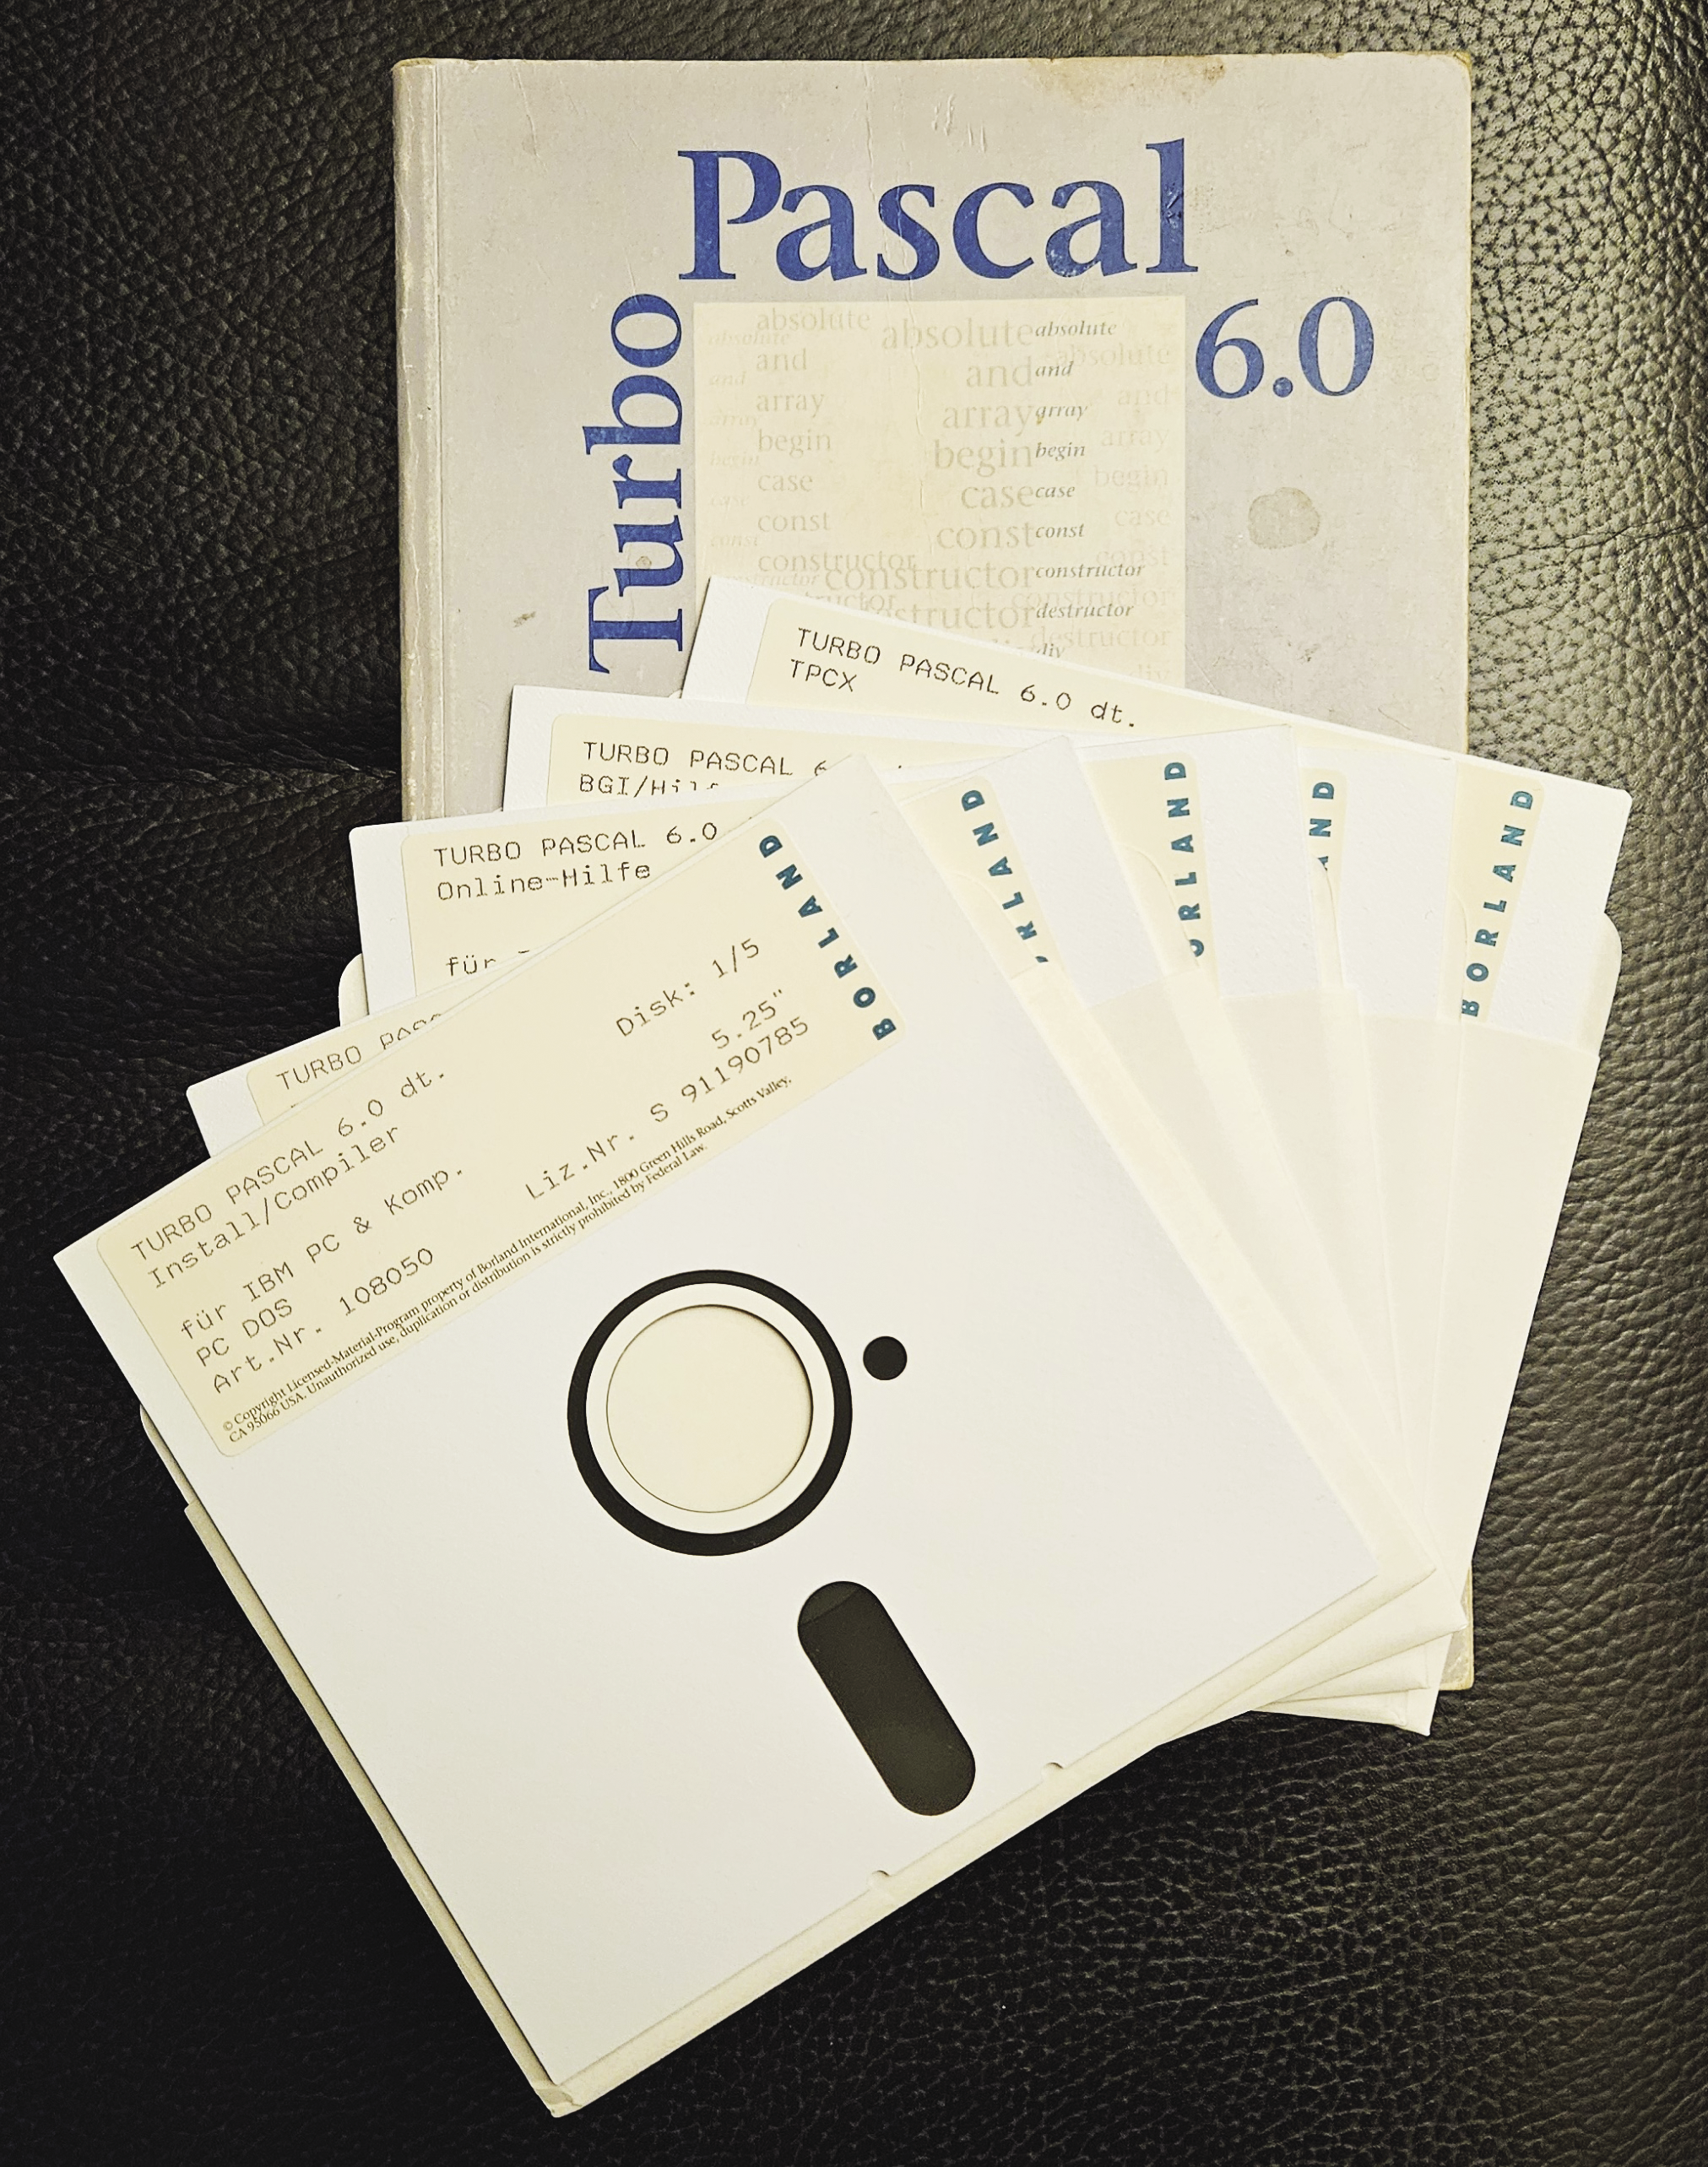
While you’re playing around with old DOS software, why not learn an old programming language? It doesn’t always have to be Basic – there is so much more. So let me introduce you to the first language and integrated development environment that I used on a PC in the early 1990s: Turbo Pascal (Figure 7). The Pascal compiler and editor were available for several platforms, including various Z80-based CP/M machines and old Motorola 68000-based Apple computers.
I’ll start with setting up the environment:
- Grab the Turbo Pascal 7.0
.zipfileTP.zipfrom Archive.org – this is not a complete installation, but just enough to try out the IDE and compile a simple text filter application. - Unpack the
.zipfile into a new folderTP. - Inside the
TP/SOURCEfolder, add an empty file with a.pasfile name (for this example, I’ll call itrev.pas). - Run DOSBox-X with drive
C:mapped to theTPfolder.
In DOS, open the source code file in Turbo Pascal via
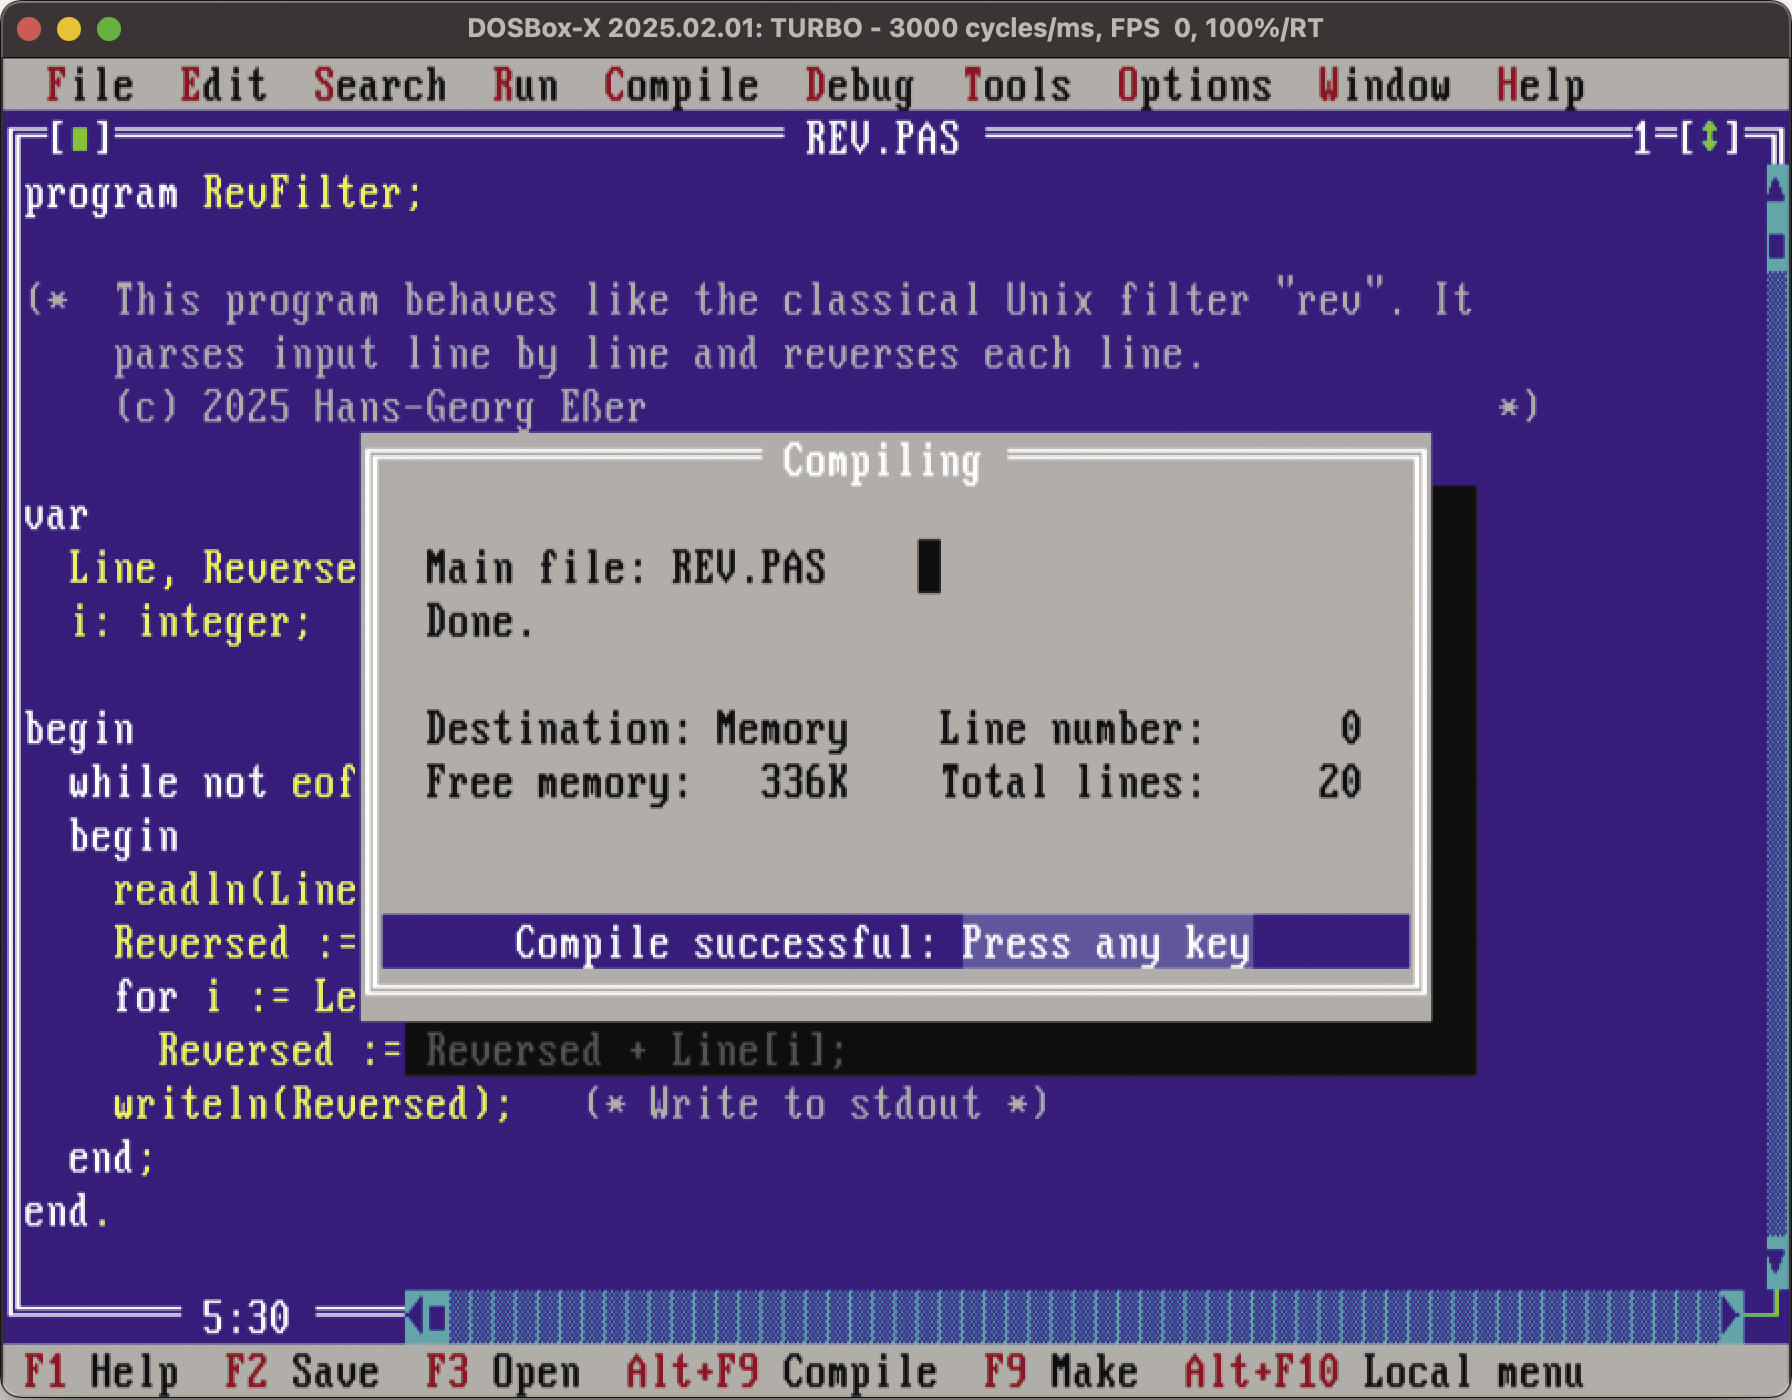
\bin\turbo \source\rev.pasand type in the lines from Listing 3. (You can skip the comments between (* and *).) Save the code by pressing F2, change the compiler output to disk file via the Compile | Destination menu entry, and then press F9 to compile the code and create rev.exe, a DOS executable (Figure 8).
Listing 3: rev.pas
01 program RevFilter;
02
03 (* This program behaves like the classical Unix
04    filter "rev". It parses input line by line and
05    reverses each line.                         *)
06
07 var
08   Line, Reversed: string;
09   i: integer;
10
11 begin
12   while not eof do
13   begin
14     readln(Line);        (* Read from stdin *)
15     Reversed := '';
16     for i := Length(Line) downto 1 do
17       Reversed := Reversed + Line[i];
18     writeln(Reversed);   (* Write to stdout *)
19   end;
20 end.
Every Pascal program starts with a program line that names the program, and then the var keyword starts the definition of global variables. When using procedures and functions (both can take parameters, but only functions return a result), their local variables are declared via separate var statements.
The example program uses three types: string and integer are mentioned explicitly in the variable declarations, and Line[i] is of type char (a single character). The eof function takes a file pointer as an argument and returns true if you’ve reached the end of the file (EOF) that you’re reading. When calling it without an argument, it checks whether standard input has ended.
As long as there is more input to process, the while loop reads another line from standard input (readln) and reverses it: That happens in the for loop, which takes individual characters from the line, starting with the last one, and appends them to a new string. When all characters in the current line have been read, the program writes the reversed string to standard output (writeln).
Block structure in Pascal is explicit; every block starts with begin and ends with end. The main program ends with end. (with a trailing dot).
Testing Rev
You can test the filter program by quitting Turbo Pascal with Alt+X and then typing
cd \source
type rev.pas | rev
It should output the source code with all lines in reverse order. Also try using the filter twice in a row:
type rev.pas | rev | rev
That should undo the effect and just output the file.
If you’re interested in the Pascal programming language, you don’t have to stick with Turbo Pascal on DOS. Instead, have a look at Free Pascal, an open source compiler with good compatibility with Turbo Pascal. It’s available for many operating systems, including Windows, Linux, and macOS.
DOS Details
Also, you might want to read up on MS-DOS and the clones and how they work. In his book, Pat Villani (the developer who started the FreeDOS project) describes how he was able to re-implement MS-DOS functionality without access to Microsoft’s source code. There are still a lot of use cases for DOS, and it’s nice that there are several options for running the old disk operating system. If you think that DOS is too modern, have a look at its predecessor, CP/M.