Fleet Flyer
Drones are more fun if you can program the unmanned aerial vehicle yourself. The DJI Ryze Tello and Python make this possible.
In this article, I work with the DJI Ryze Tello drone, which is available on Amazon and from other vendors for around $99 (£99/EUR100). Why this model? The drone was designed for educational use and has open interfaces for that purpose. In other words, you can develop programs for the drone in Scratch or Python.
To familiarize yourself with the drone’s capabilities, you first need to download the app that gives you manual control of the drone. The drone’s battery lasts about 13 minutes, and the control range is about 100 meters. Because it is intended for operation inside buildings, this range is fine. If you get lost, the built-in 720p camera with electronic image stabilizer lets you view your current location.
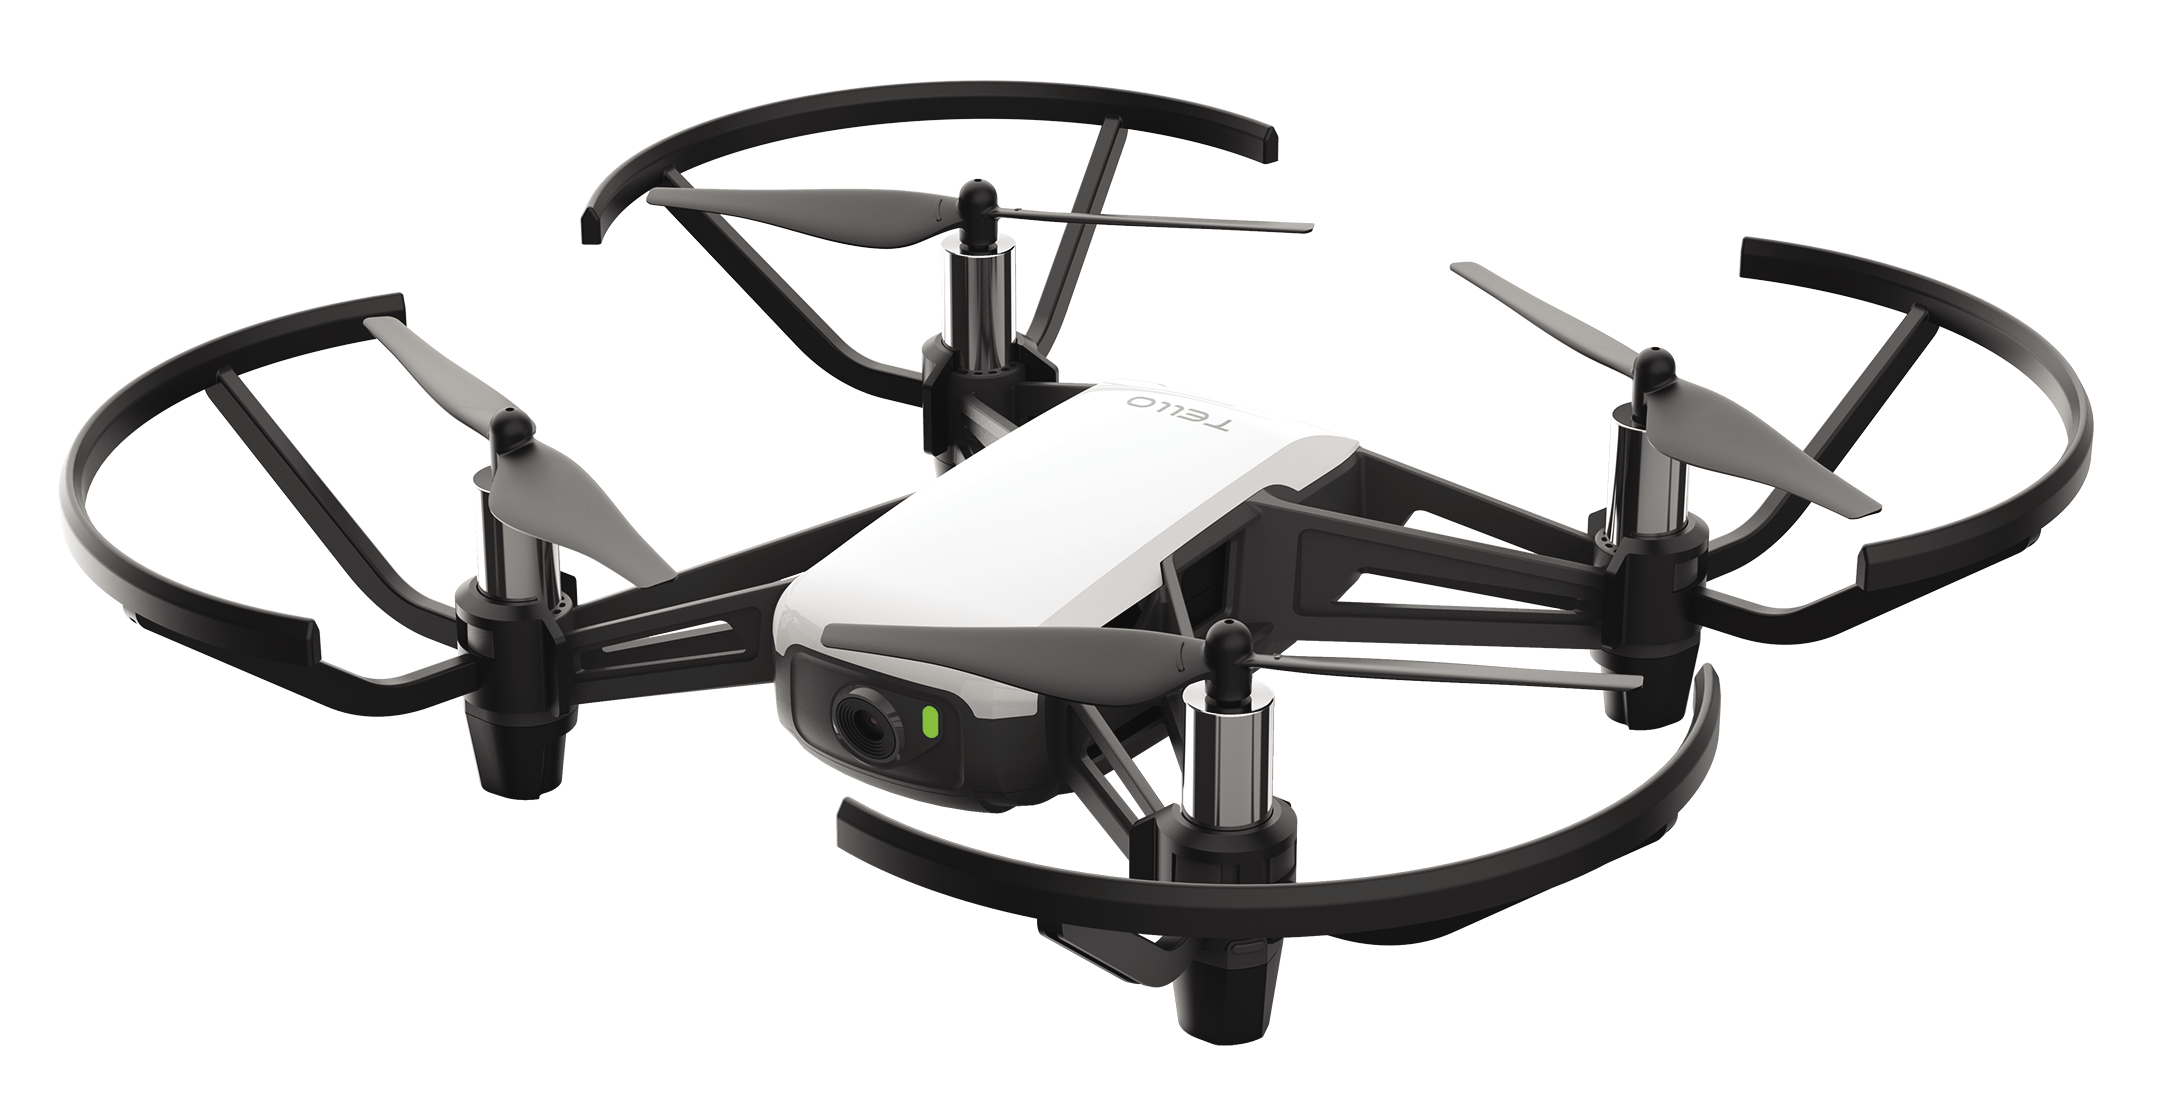
For more intensive use, a Tello with the indispensable boost combo add-on adds $49 (£39/EUR45) to the price. Among other things, you get two extra batteries and a propeller protection set. During your first programming attempts, the propeller guards will definitely help prevent serious damage (Figure 1). Further information about the DJI Ryze Tello can be found on the manufacturer’s website; the essential technical data is shown in Table 1.
|
Feature |
Spec |
|
Dimensions |
98.0x92.5x41.0mm |
|
Weight |
80g, including propeller and battery |
|
Battery |
1.1Ah/3.8V (removable) |
|
Connector |
Micro-USB port for charging |
|
Other |
Rangefinder, barometer, LED, vision system, WiFi 802.11n, 720p live streaming |
|
Performance |
|
|
Max. flight range |
100m |
|
Max. flight altitude |
30m |
|
Max. speed |
8m/s (18mph) |
|
Max. flight time |
13 min |
|
Camera |
|
|
Field of view (FOV) |
82.6 degrees |
|
Photography |
5Mpx (JPG, 2592x1936px) |
|
Video |
HD720p30 (MP4) |
Software Installation
To download the app for the drone, search for Tello in the Google or Apple app store. The app also lets you update the drone’s firmware. Instructions on how to do this can be found in the “Updating the Firmware” box.
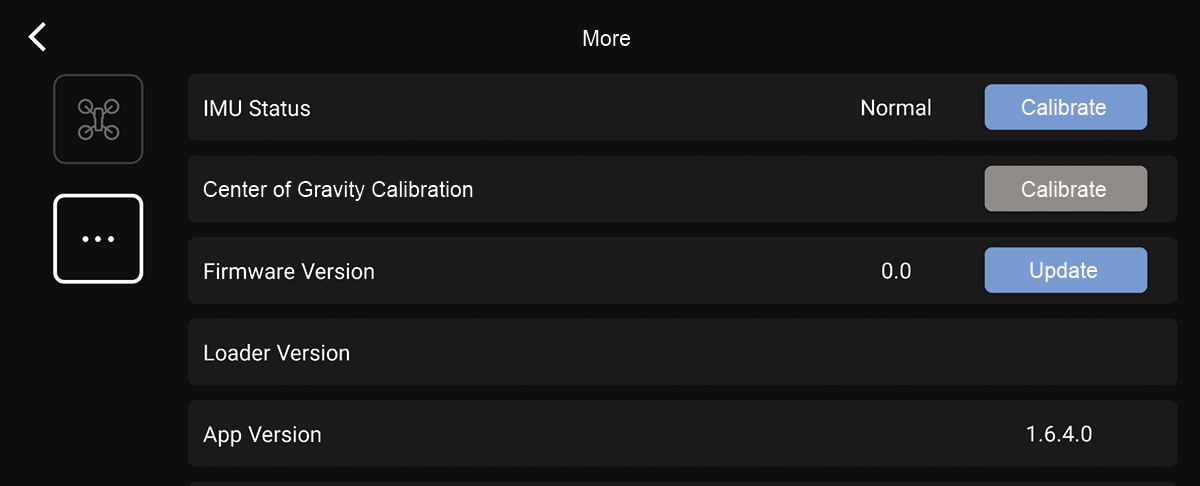
You never know exactly how long the drone has been sitting around in a warehouse, so before doing anything else, it’s a good idea to update the device’s firmware from the app on your smartphone. To begin, connect to the drone and then switch to the app’s settings with the gear icon. When you get there, tap More, then the three dots (Figure 2), and Update in the Firmware Version line. You will then see the release notes and can start the update process by tapping Update.
To connect to the drone in the app, first turn on the drone and wait until the LED flashes, which indicates it is starting a separate WiFi network to which you need to connect. Now launch the Tello app and connect to the drone. The app tells you the steps required. If everything worked, you will see the camera image in the app. The drone can now be launched with the lift-off icon at top left.
You can control four degrees of freedom in the app: forward and backward, left and right, up and down, and rotation about the z axis in both directions. You will encounter these four degrees of freedom again when creating programs. To make sure everything is working properly, go on a small test flight before you try controlling the drone with Python.
Before you start programming, you might want to install a suitable integrated development environment (IDE). PyCharm Community by JetBrains is a good choice for this project. You will find versions for different operating systems on the project website. The installation completes the preparations, and you can now proceed to write your first program for the drone.
Connection Test
To create a program with PyCharm, select File | New Project. Leave all the default settings as is except for Location: Enter a meaningful project name in this field as the last component of the path. After pressing Create, the IDE directly creates a main.py file, where you will save your own program after deleting the sample code in the file.
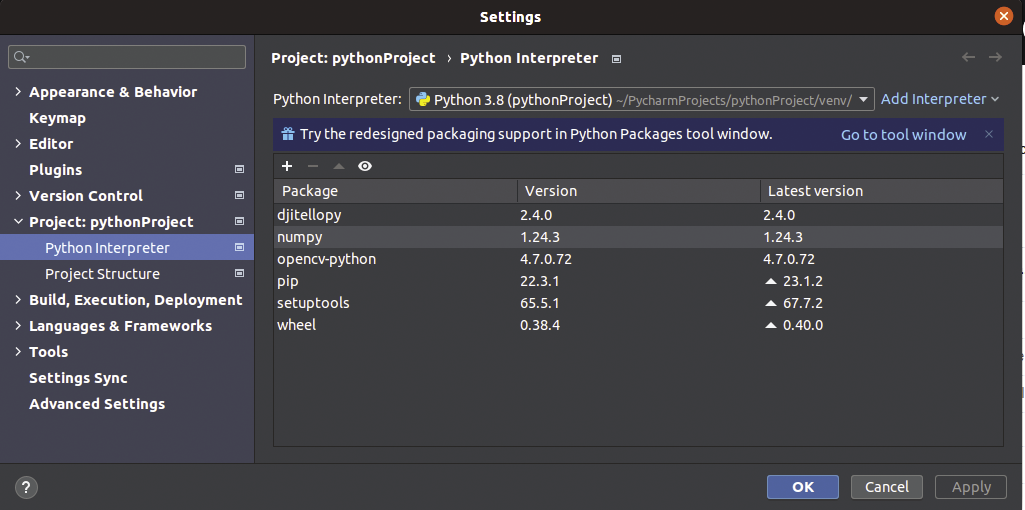
To use your scripts, you need to include a drone control library in your projects by selecting File | Settings | Project:<name> | Python Interpreter and pressing the plus icon to install the djitellopy library (Figure 3).
The program in Listing 1 connects to the drone and displays the temperature and battery level. These two readings are very important for drone operations. If the charge level is too low, you do not want to fly. If the electronics or the battery are overheating, it’s time for a short break. To start the program, just click the green arrow at the top of the IDE. Listing 2 shows the program output.
Listing 1: Opening a Connection
from djitellopy import tello
drone = tello.Tello()
drone.connect()
print("Temperature: "+drone.get_temperature())
print("Battery: "+drone.get_battery())
Listing 2: Connection Output
[INFO] tello.py - 122 - Tello instance was initialized. Host: '192.168.10.1'. Port: '8889'.
[INFO] tello.py - 437 - Send command: 'command'
Temperature: 60.0
Battery: 93
[INFO] tello.py - 461 - Response command: 'ok'
Process finished with exit code 0
Depending on your computer’s feature set, if nothing is working you might only see an error message. The program must connect to the drone’s WiFi to achieve control. Most desktop PCs do not have a WiFi interface. A simple and inexpensive solution to this problem is a USB WiFi adapter. I had one in my tinkering box that worked perfectly with Ubuntu.
Ready to Start
You now know how to connect the computer to the drone and query simple status information, so it’s time for a small test flight. With the program in Listing 3, launch the drone, let it fly forward a few centimeters, and then land. Controlling the drone always follows the same pattern. You create an object for the drone and call its methods to perform the specific actions.
Listing 3: Flying the Drone
from djitellopy import tello
drone = tello.Tello()
drone.connect()
drone.takeoff()
drone.move_forward(30)
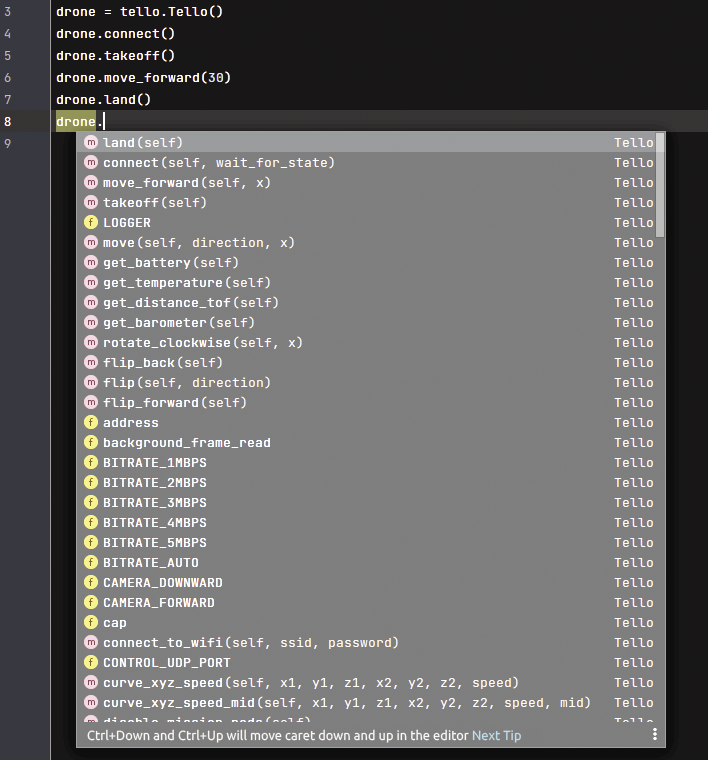
drone.land()To discover what actions the object supports, mouse over a method and press Ctrl+Left mouse button to access the library’s source code, where you can snoop around a bit. Alternatively, type drone. and scroll through the menu (Figure 4). I did look for better documentation for the library, but my search turned up nothing.
I need to talk about one more special method for the drone object: send_rc_control specifies motion speeds for the drone’s individual degrees of freedom. The permissible values range from -100 to 100. The method supports four parameters:
- Speed left or right
- Speed forward or back
- Speed up or down
- Rotational speed clockwise or counterclockwise
This method is a simple way to control the drone remotely.
And … Action
To complete the picture of the DJI Ryze Tello’s feature set, take a look at how you access the camera. To begin, you need to include the opencv-python library in the project. Proceed in the same way as described for the djitellopy library. The very powerful OpenCV library provides extensive functions for image processing.
The program in Listing 4 opens the video stream from the camera and displays it in a new window. Note that the camera displays the many individual images quickly one after the other. To change the resolution of the images, remove the comment hash (#) at the start of line 8.
Listing 4: Video Stream
01 from djitellopy import tello
02 import cv2
03 drone = tello.Tello()
04 drone.connect()
05 drone.streamon()
06 while True:
07 image = drone.get_frame_read().frame
08 #image = cv2.resize(image, (200, 200))
09 cv2.imshow("Tello Drone", image)
10 cv2.waitKey(1)
Good to Know
In testing, the DJI Ryze Tello turned out to be a light-loving device. If it is too dim in your office, the drone will not work properly and will constantly output messages like error No valid imu. In flight, the camera is used for navigation, and if the camera does not have enough light, the image becomes unusable.
As soon as you take a closer look at the Tello’s camera, you will notice that image processing is computationally intensive, so reducing the resolution of the videos to counteract this problem is helpful. Often, even images with a considerably lower resolution are sufficient for further processing.
Nothing is more annoying than a drone that crashes because of a lack of power, so you should check the battery charge level in your program before each start and automatically exit the program if it is too low.
Conclusions
During this test, the drone suffered quite a few collisions with all sorts of objects in the office. Two propellers disappeared never to be seen again after a crash. A houseplant standing in the flight path was involuntarily cut back – and it’s surprising how far shredded leaves fly.
During your first flight attempts, take meticulous care to remove any objects potentially standing around in the flight path area and fly the drone in as large a space as possible. At the end of the day, coming to grips with the DJI Ryze Tello and learning more about the little flying machine is massive fun. The only drawback of the compact drone is the relatively poor battery capacity, which will force you to take many breaks.