Watching Your Pets with a Raspberry Pi and a Mesh VPN
A Raspberry Pi, a Pi-compatible camera, and a mesh VPN are all you need to watch your pets from afar.
You have a pet, but you need to be away from home for a day. Is it really worth paying for a kennel when all you want is to keep an eye on your pet while you’re away? Of course, you could use a video doorbell service (like Ring or Arlo) and simply locate the camera device inside your home, but it seems like overkill to pay for a monthly service for something that you only need occasionally. Also, for privacy reasons, some people might not want to invite a streaming video service into their home when they don’t have control over how the video is processed and stored.
On the other hand, if you have a Raspberry Pi, an Internet connection, and a Pi-compatible camera, it is actually pretty simple to set up your own remote access pet cam with a mesh VPN. Years ago, in order to get something like this to work, you’d need to open a port on your home router/firewall and enable port forwarding in order to allow incoming connections. That’s a risky undertaking, because you’re opening the door for anyone who port scans your router to find an entrance to your home network. Thankfully, there are free services available that allow you to host your own VPN using your Internet connection at home.
Setting Up a Camera on Your Raspberry Pi
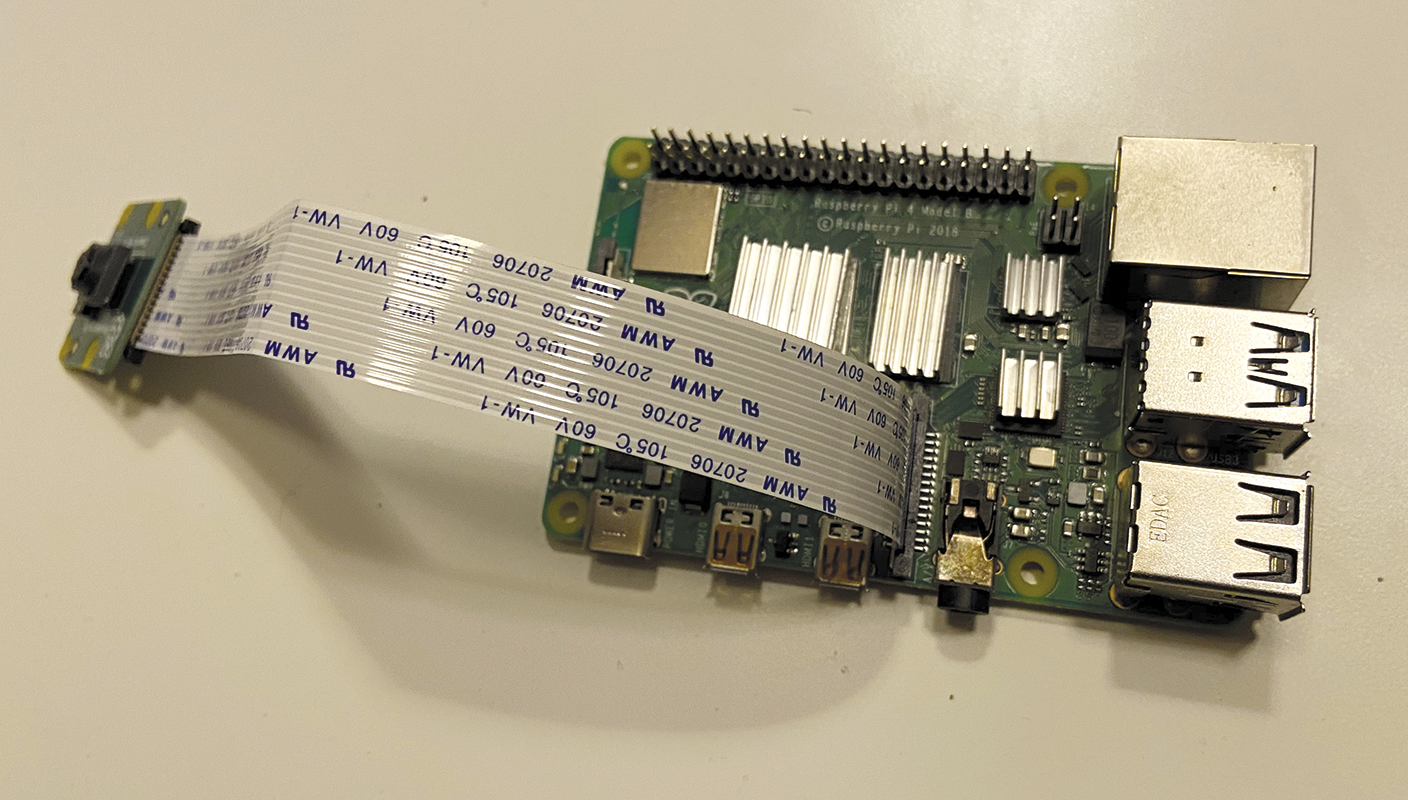
The first step is to set up a Pi-compatible camera for your Raspberry Pi. I say, “Pi-compatible” because there are many compatible cameras that work with the Raspberry Pi. Therefore, feel free to find any camera that works with your version of the Raspberry Pi and fits within your budget. I tested my setup with the Pi Camera Module 2, which has an 8MP image sensor and only cost about $10 online. In case you’ve forgotten, the Raspberry Pi includes a dedicated camera port directly on the board that is used exclusively for any of the Pi-compatible cameras (Figure 1). Therefore, installing the camera is a four-step process:
- Shut down your Raspberry Pi if it is already turned on.
- Lift (but don’t try to detach) the plastic guard that’s on top of the camera port.
- Insert the ribbon cable for your Pi-compatible camera into the camera port, and ensure that the blue strip on the ribbon is facing towards the USB and Ethernet ports.
- Push down and close the plastic guard on the camera port to lock everything in place.
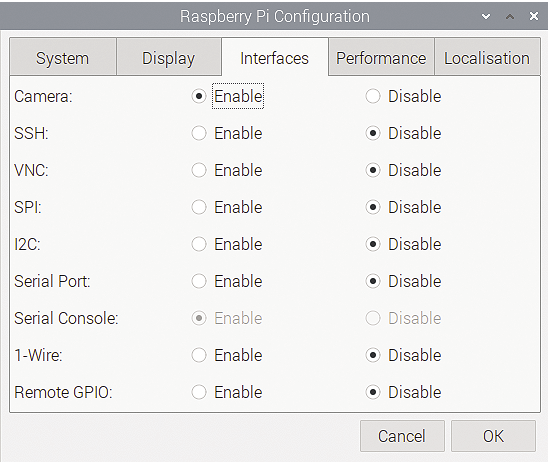
Now that you’ve got your camera installed, the next step is to ensure that your Raspberry Pi recognizes the camera. Go to Preferences | Raspberry Pi Configuration to access the Preferences Configuration screen for your Raspberry Pi.
Click on the Interfaces tab and make sure that you select the option that enables the camera (Figure 2). To save the settings, click the OK button, and then reboot your Raspberry Pi.
Taking a Still Photo
Now that you’ve gotten your camera installed and configured, you need to make sure that the drivers work properly and can recognize the camera. Therefore, take a simple still photo (no need to try out streaming video yet) to make sure that the camera is recognized by your Raspberry Pi. Execute the following command at the terminal:
raspistill -o petcam1.jpgBy default, the raspistill utility waits for five seconds before taking a photo, so be sure to wait the appropriate time, and check your local directory to verify that the picture was taken.
Live Streaming on the Local Network
Now that you know the Pi is able to use the camera, the next steps are to use the camera in video mode, open a port on the network interface, and serve the video feed to anyone who knows the local IP address and port of your Raspberry Pi.
These steps require both the raspivid command and the open source VLC media player. If you don’t already have the VLC player installed on your Raspberry Pi, execute the following command to install it:
sudo apt install -y vlcNext, create an 800x600 H264 video feed at 12 frames/sec and open port 3141 on the Raspberry Pi to serve the video as a livestream using the Real Time Streaming Protocol (RTSP) with:
raspivid -o - -t 0 -w 800 -h 600 -fps 12 | cvlc -vvv stream:///dev/stdin --sout '#rtp{sdp=rtsp://:3141/}' :demux=h264
You might be more familiar with common TCP-based protocols such as HTTP and FTP, but RTSP is an alternative protocol used exclusively for streaming video and audio. Because web browsers don’t support RTSP, you need to use video tools such as VLC or QuickTime in order to view an RTSP video stream. To view the video stream within your home network, you need to install an RTSP client on your desktop or laptop computer.
If you’re using VLC, navigate to Media | Open Network Stream in order to open a dialog window that enables you to type in the IP address and port number for your video stream (Figure 3). The URL for the video stream must be in the following format:
rtsp://ip_address:port_number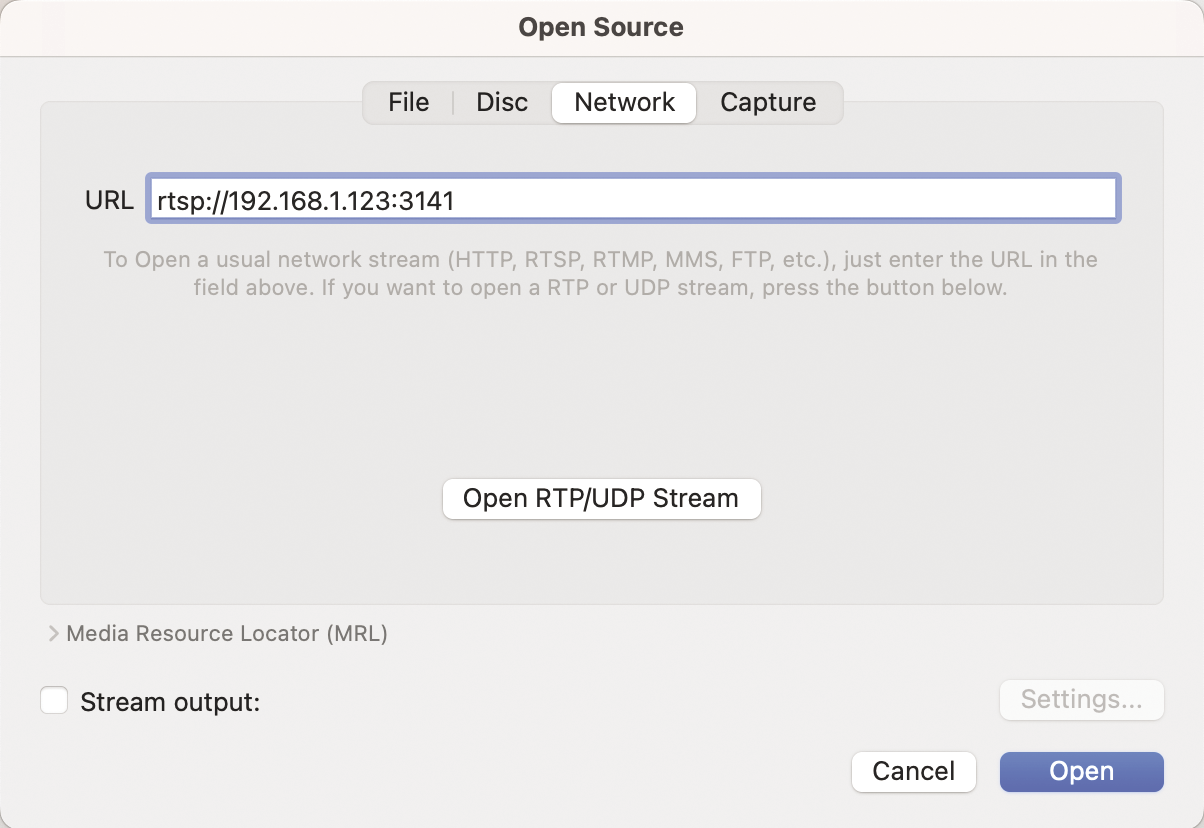
Viewing the Stream While Away
Now that you’ve got the camera and the video streams working from inside the local home network, it’s time to set things up to view the pet cam while you’re away from home. Of course, to test this out, you’ll need access that is different from your local LAN. You might want to connect over your cell phone’s hotspot for testing purposes.
Most home routers today provide network address translation, which means that the hosts on your home network are not addressable from the Internet. One way around this is to go to the admin settings of your home router, open a particular port, enable port forwarding on the router, and assign the forwarded port to the specific device (and port) that you would like to access remotely. However, this approach is ill-advised in today’s security environment, because anyone with a port scanner can scan your router, find the open port, and use it to attack your network.
Thankfully, free services exist today that allow you to securely host your own VPN service and connect to your personal devices located behind firewalls and LAN routers. A traditional “old school” VPN would allow you, while at home, to remotely connect and access the computers and servers at your job. Using a self-hosted mesh VPN service (in this case, I’m using Tailscale), I can be away from home at my job (or anywhere for that matter) and connect to the devices inside my home. Although Tailscale does not have a free software license, the company that maintains it provides a no-cost version for personal and hobby projects.
In order to set up a mesh VPN using Tailscale, all you need to do is install the free Tailscale client on each device that you want to participate in your personal VPN. Then log in to each client that you want to connect in the personal VPN.
The command to install Tailscale on the Raspberry Pi is:
curl -fsSL https://tailscale.com/install.sh | shOnce you’ve connected your devices over your self-hosted mesh VPN, you can test the connectivity between devices by sending a ping request to your home PC while outside of your home network. If the ping works, the devices are connected.
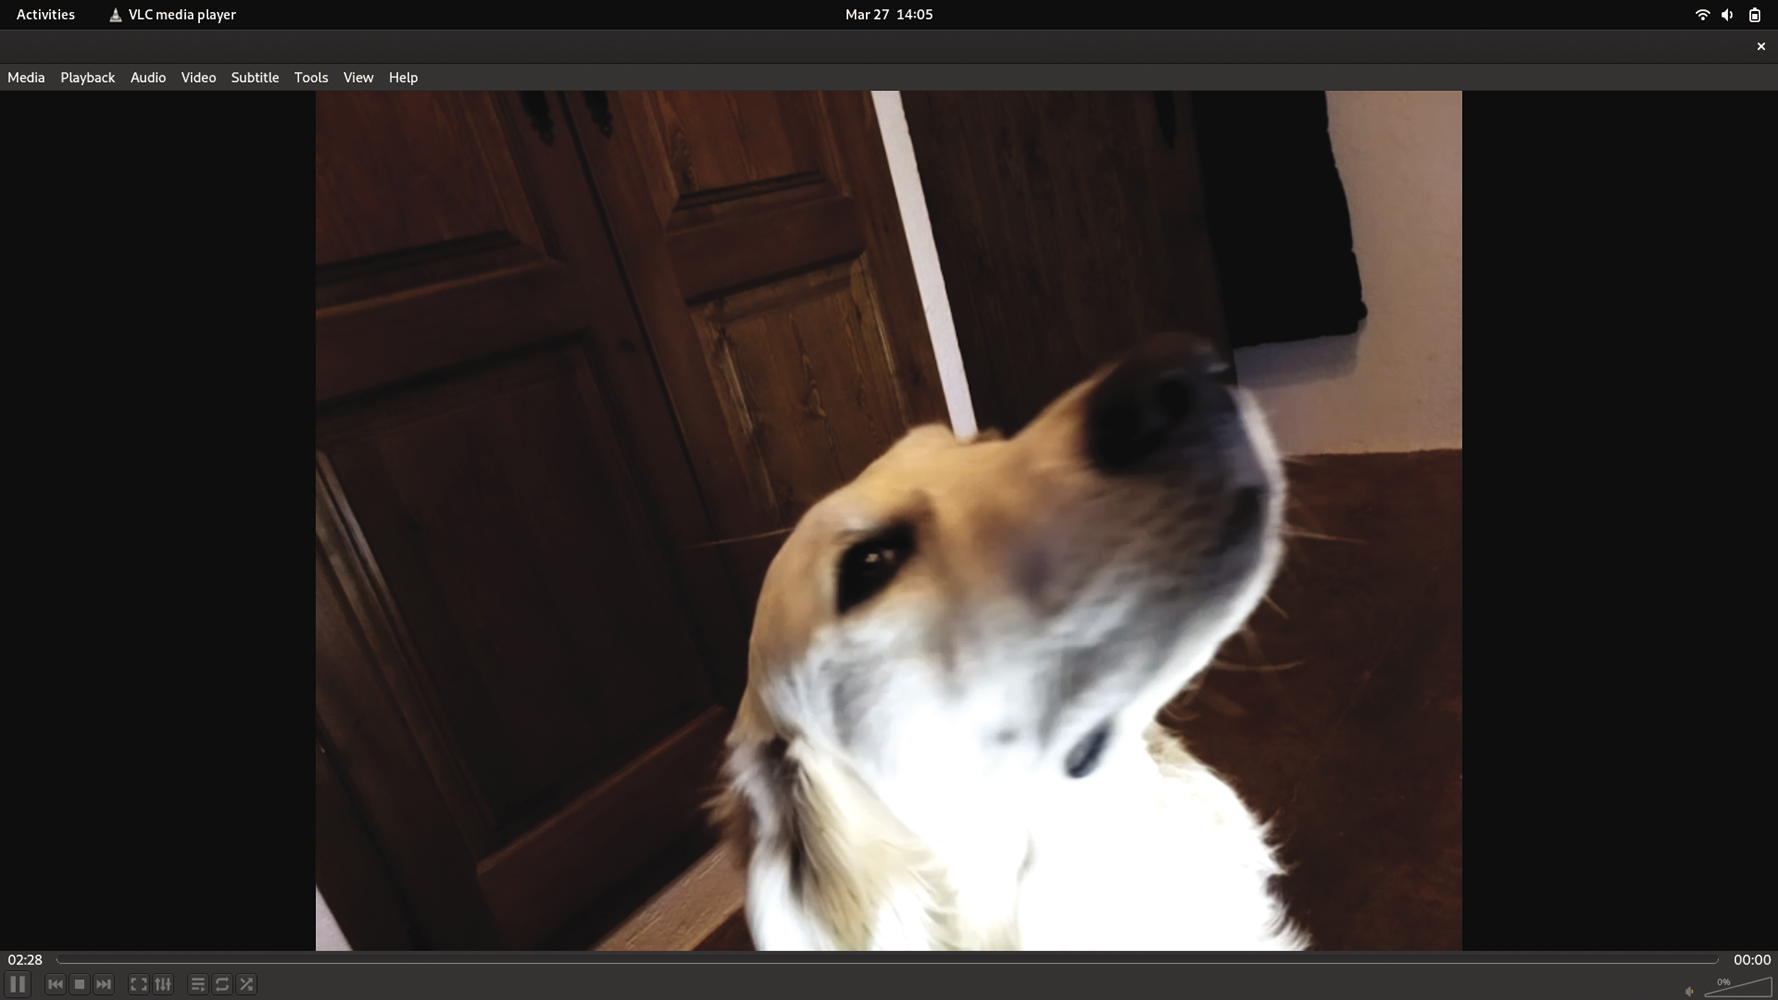
The final step is to use your RTSP client app just as before, but this time, swap out the local-only IP address with the mesh VPN address of your Raspberry Pi. Voila, a self-hosted, mesh-VPN-enabled pet cam (Figure 4)!
Conclusion
This simple exercise illustrates the power of the Raspberry Pi as a practical tool for customizing your home environment. If you don’t have a pet, you can easily adapt these techniques to watch your yard or observe wildlife. If you really get ambitious, you could even integrate a motion detector or set up a Pi-compatible infrared camera for night vision.